 Using a screencast is a great way to record information that your students may need to review to understand key concepts. Screencasts allow users to review materials at their own pace and the addition of captions allow all users to follow along.
Screencasting software allows you to record your computer screen, audio and/or yourself using a webcam. It’s a great technique to produce assessment briefs or to record key parts of your lectures.
Before creating your screencast there are a few things to consider.
- Your target audience – are you using appropriate resources and language?
- Resources – have you prepared all the resources you need?
- Recording – is your environment conducive to create your screencast?
- Technology – do you have access to all the software and hardware that you need?
Follow these seven steps to create and deploy your recording.
- Set up your PC
- Open up the resources you need
- Open Screencast’o’matic
- Record your screencast
- Edit your recording
- Upload to YouTube
- Embed in to your Blackboard site
Set up your PC
Plug in your webcam and microphone, if needed. Many webcams and laptops have both built in. You may have to adjust your audio levels. Too high and your voice may become distorted/clipped, too low and your audience will not be able to hear you. Make a test recording and if the playback isn’t at the correct level you will need to adjust your audio.
To check the sound level on your microphone, go to the Windows search in the bottom left-hand corner of your screen, type in Control Panel, and in the new ‘pop-up‘ select Hardware and Sound. Then select ‘Manage audio devices‘, select ‘Recording‘ and pick your microphone by double clicking on it. In the new pop-up choose ‘Levels‘ and then adjust them until your recording sound perfect.
Open up the resources you need
Make sure all the resources you plan to use are on your PC. Open them all and run through your presentation to check that you can move seamlessly between resources. You can use any resource that you can use on screen. Make sure that you have copyright permission for any materials that you will be using.
If you are creating a screencast for an assessment brief you can download a checklist here which will give you some ideas of what to include.
Open Screencast-o-matic
Open Screencast-o-matic and run the recorder. Click on ‘Start Recorder‘ and then ‘Download launcher’ at the bottom of the page. Save the install.exe file to your PC and double click on the installer in the download tray at the bottom of the screen and when it has been installed click on ‘OK‘. Then click on ‘Try again‘ at the bottom of the page and then click on ‘Open Screen Recorder Launcher 2.0‘ in the new pop up. You will then need to add in the password – SHU2019OSR. The screen recorder will now launch.
Record your screencast
On your screen you will see the screencast recorder.
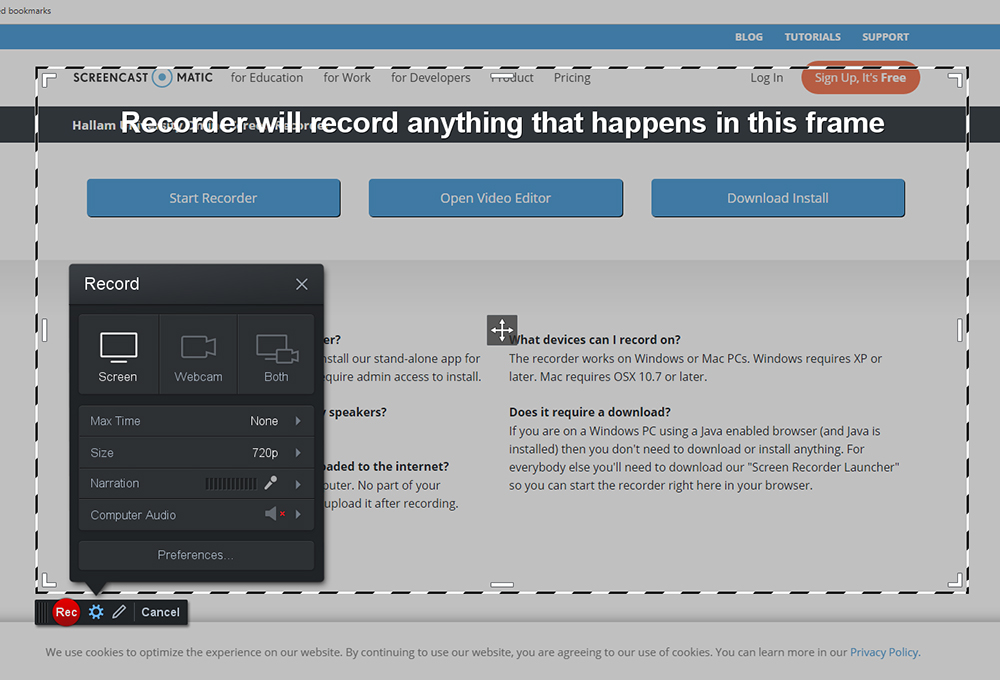
Anything within the dashed line will be recorded. Click on ‘Size‘ on the Record pane to select full-screen and check to make sure the microphone is working and your computer audio is turned off. Remember to close applications such as your email so that alerts do not pop halfway through your recording.
This link will take you to playlist of screencasts to give you some ideas, examples of good and bad practice.
Edit your recording
Once you have recorded your screencast the footage is saved on your local drive and you can edit your recording. It is easy to make minor edits such as cutting pauses and trimming the beginning and end.
Upload to YouTube
Your screencast can be uploaded directly to your university YouTube channel. Remember to select ‘Unlisted‘ when you upload it. Recordings made in Screencast’o’matic can be any length but we recommend that you break your information up in to smaller chunks, no more then 5-6 minutes so that it easy for users to digest and re-watch if necessary. If your recording is over 15 minutes you will need to verify your YouTube before YouTube will allow people to view it.
Embed in to your Blackboard site
Once you have your video in YouTube you can either copy the link so that students can click through to it or use the embed code <> to allow your students to watch your recording(s) within Blackboard.
You will find embed codes <> all over the web, from video content, podcasts, Google slides and docs. These will allow you to embed content direct in to your Blackboard sites. As you are only linking to a resource and not making a copy you are not breaking any copyright laws in the process.